Moving to another country can be a stressful experience that a lot of us would just rather stay within the comfort of our new homes, at least for the first couple of days. But heck, how are we supposed to feel better when even the things inside the house bring confusion with its every button? I am therefore coming up with a series of articles that would serve as guides and help out other clueless gaijins get around and get the most out of their house in Japan. Today, we will be talking about how to use your Japanese washing machine.
Note that depending on the brand and model, there might be some differences with features shown in this article. But fret not, most machines offer the same array of choices and I’m pretty confident that we will still be covering all the information necessary to get you started on your next wash. First, we will get to know the many buttons and labels found on your machine. Then, I’ll show you the very easy sequence of steps I follow when doing my laundry.
The Buttons And What They Mean
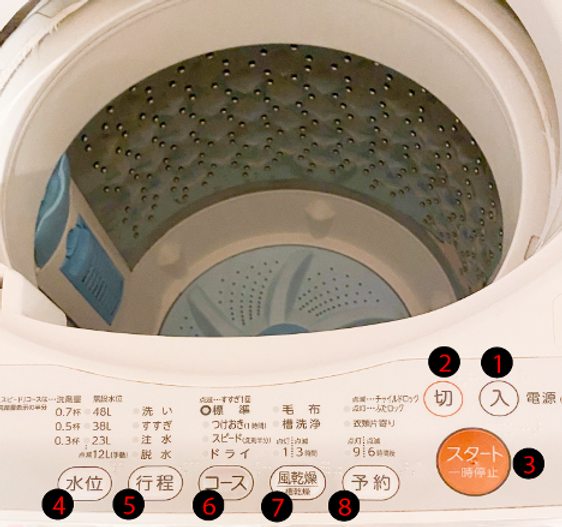
Your washing machine would have a control panel right in front just like the one shown below. Most labels would be in Japanese so it would be helpful to first know what they mean. Of course, you won’t have to memorize them, you could always use this article as a reference until you finally get a feel for things and operate the appliance without guidance. Also, know in advance that in most cases, you would probably be pressing the same two buttons every wash. So no, this is not rocket science at all.
Buttons 1 and 2 are the power buttons. Number 1 will turn on the machine and 2 will power it down. For some machines, these two kanjis will be inside one button; in which case, you only need to press it to toggle between on and off. If it is somehow indicated differently on your machine, just look for the 入 kanji (example: 電源入) especially if it is obviously set apart from the other buttons as that would most likely be the power button.
Once you’ve turned on your machine, your wash will not begin automatically. If you’re ready for it to, you’re going to have to press Button Number 3 which says ‘Start’ or ‘Pause’.
Now, for Buttons Number 4-8, the way it works is that you press the button to cycle through the choices that are written above it. The bulbs beside the choices light up as you go through them.
Button 4, which in some machines could also appear as ‘水量’ means ‘water level/water volume’. You can see in the picture that this is indicated in liters (23L, 38L, 48L). In most cases, after you’ve loaded your laundry, the machine will automatically ‘weigh’ it and after you’ve pressed the start button, water will start flowing inside the machine based on that weight. However, if you feel like the amount indicated is not quite right for your load, you can simply change the amount by pressing Button 4.
Button 5 is for indicating the ‘steps’ of the wash. Multiple of the words indicated above will automatically light up depending on the ‘Course’ of wash that you would choose (more on that later). The words and their translations are as follows:
- 洗い (could also appear as 洗濯 / あらい) : wash
- すすぎ: rinse
- 注水: add water
- 脱水: drain
Button 6, which is katakana for the word ‘Course’, lets you choose the (obviously) course or type of wash you want to do. The top option (標準 ) is the ‘standard wash’. When you press the start button, most machines default to this course. Since this is good enough for me, I almost never have to change it.
Other types of wash offered will depend on the machine. For the one we have at home, the second option is つけおき. You would choose this if you want an ‘intense wash’ (taking 1 hour) – useful for whites or very soiled clothing. Next to it, スピード, is for speed washing which would take half that of the standard wash time. This is followed by ドライ literally means is the Katakana writing of the English word ‘dry’.
However, don’t misunderstand. It does not mean ‘drying your clothes’. Rather, it’s for a dry(cleaning) course that is meant for your delicates. The courses offered on this machine actually include the first two options on top of Button 7. Choose 毛布 if you are washing beddings or futons. 槽洗浄 is for the drum cleaning course which is a function that uses water (and, if you want, products you can buy from the drugstore) to clean the inside of your machine.

Press Button 7 if you want to turn on the dryer function. It will toggle between the 1-hour/3-hour drying options you see above the button. I personally have never used it because I feel like it is such a waste of energy so I can’t speak to the effectivity of this function. As you can see, there is only one light beside the two options. When you press the button, you would get either a solid light or a blinking light. The solid light is for the one hour option while the blinking light is for 3 hours.
Button 8 is the yoyaku/scheduled wash function. This particular machine would let you choose between starting your wash 9 hours or 6 hours after scheduling it. Again, there is only one light. Solid is for 9 hours and blinking is for 6 hours.
The other two lights above Button 8 are actually not options but simply ‘signals’ about the status of the machine. When you start your wash and forget to close the lid, the one on top will light up to signal that you should close it. This will also most likely be accompanied by a beeping sound.
Sometimes, during the cycle, your laundry will be thrown to one side or get caught in something inside causing ‘imbalance’ in the machine. That is when the second light will function, signaling that you should adjust the load inside.
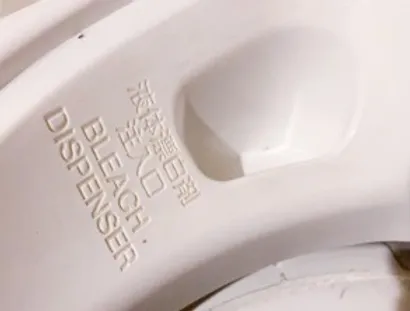
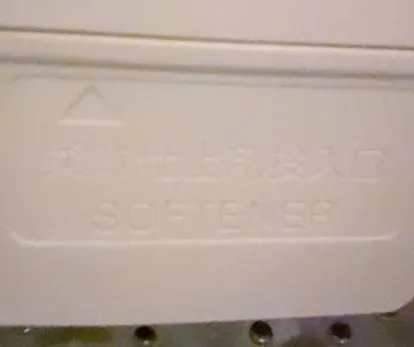
Inside the machine, you would also see labels to guide you on where to put your laundry products. Some machines, such as the one we use, actually have English translations provided as shown in the pictures. But in case yours doesn’t, just remember the following Kanji symbols:
- 洗剤 (senzai) is for detergent
- 柔軟剤 (junanzai) is for softener
How I Do My Laundry: Step-by-Step Guide to How I Use My Japanese Washing Machine
The following are the steps I take when washing my laundry:
Step 1: Press Button 1 (入).
Step 2: Load my laundry.
Step 3: Press Button 3 (スタート).
Step 4: Add laundry products. Amount of soap and/or softener should be based on the level indicated on the 水位 part. Water should start pouring into the machine shortly after.
Step 5: Close the lid.
And that’s it! The wash would start. Once it does, the machine will be ‘locked’ and you would no longer be able to lift the lid open. If you need to do so, like maybe you need to add some clothes in, simply press ‘Pause’ (Button 3).
Step 6: The machine will release the lock on the lid and beep to signal that your laundry is done. You can now simply get and start hanging them. In the case of our machine, and probably for most, there is no longer any need to press the OFF/切 button (Number 2). If you’re wondering, I only ever use that button when I decide to stop the wash (example, when I have another appointment and realize I won’t have the time to wait for it to finish.
Happy Washing in Japan

Mastering the use of your Japanese washing machine can transform a potentially confusing chore into a seamless part of your daily routine. With a bit of practice, you’ll find yourself navigating the buttons and settings with ease, ensuring your clothes come out fresh and clean every time.
Remember, each washing machine model may have slight differences, but the general principles remain the same. Keep this guide handy until you become familiar with your machine. Happy washing, and enjoy your time in Japan with one less thing to worry about! Happy washing!
Oh, and if you want to maximize the use of all the appliances in your Japanese home, be sure to check out my other guides on using Japan’s ceiling lights, intercom, and more!